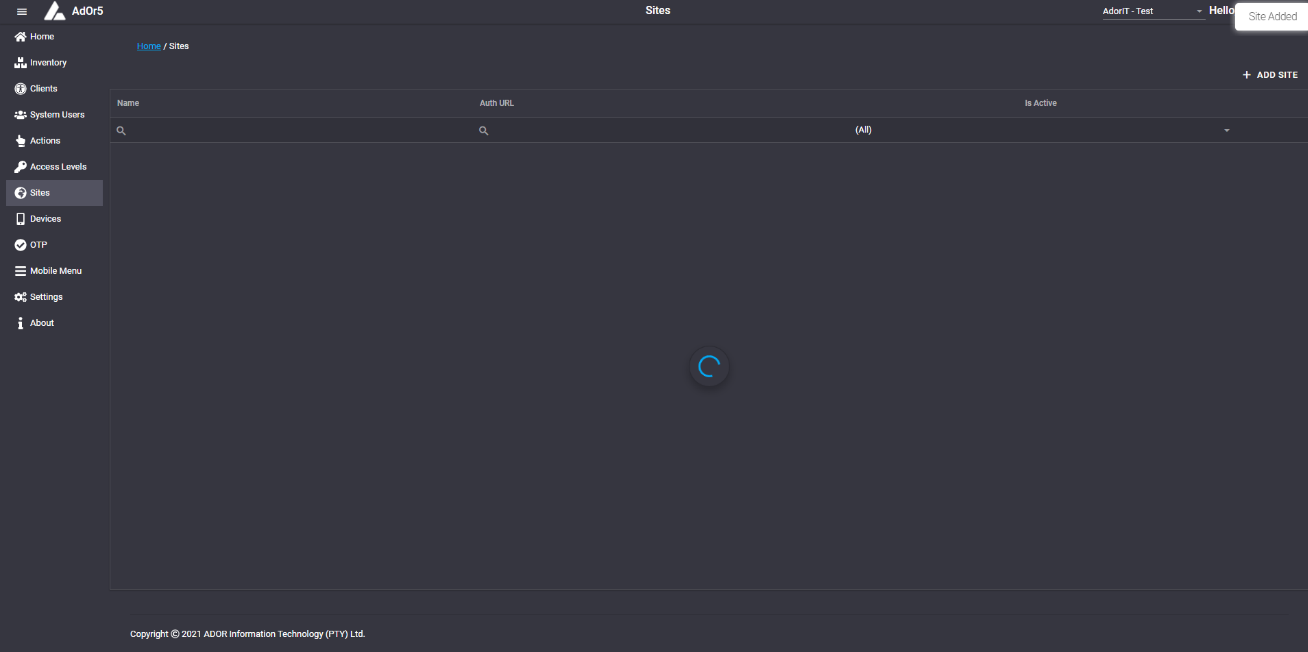
Sites Page
The sites page will display the Name, Auth Url and whether it is active or not.
Add screenshot
Add Sites
Sites can be added by clicking on "Add Sites" near the top right corner.
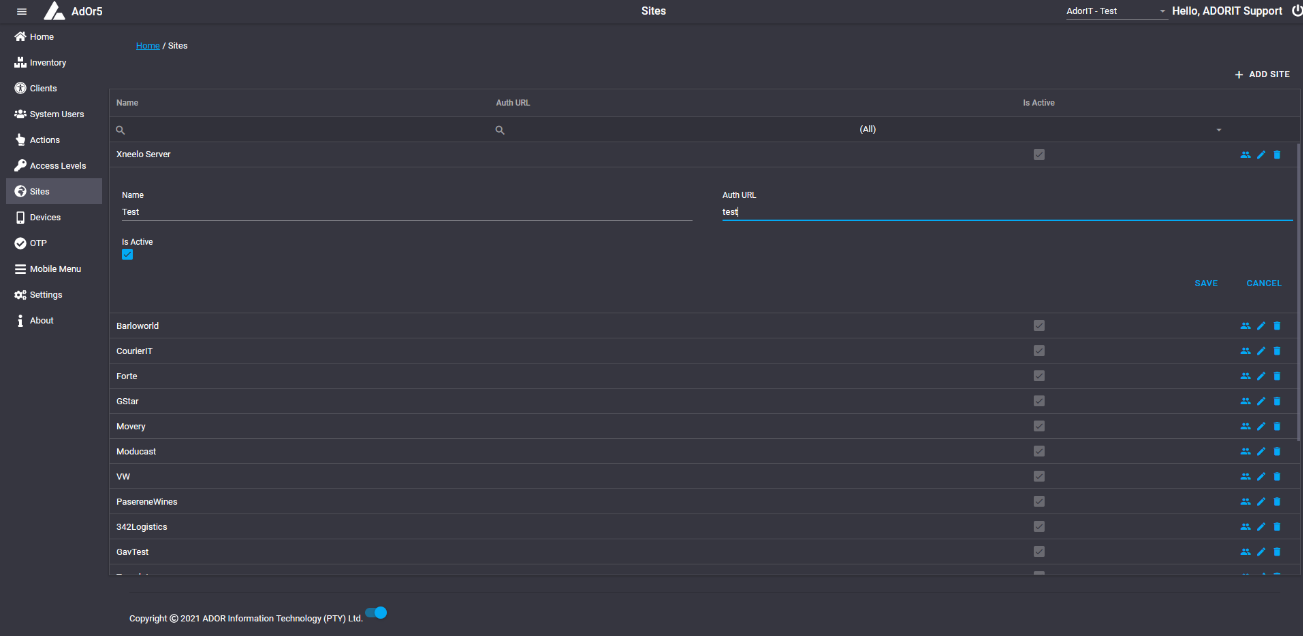
A popup will appear where the Name, Server, Username, Password, Database, Schema, Auth Url, Base Url and Port must be entered to create a new site.

After filling all the fields and clicking on Create Site, a message, "Site Added" will be displayed near the top right corner.
Edit Site
A site can be added by clicking on the pen icon next to the specific site you want to change/edit.
After clicking on the pen icon, two textboxes populated with the Name and Auth Url of the site, and also a checkbox, to check if the site is active or uncheck if it is not active.
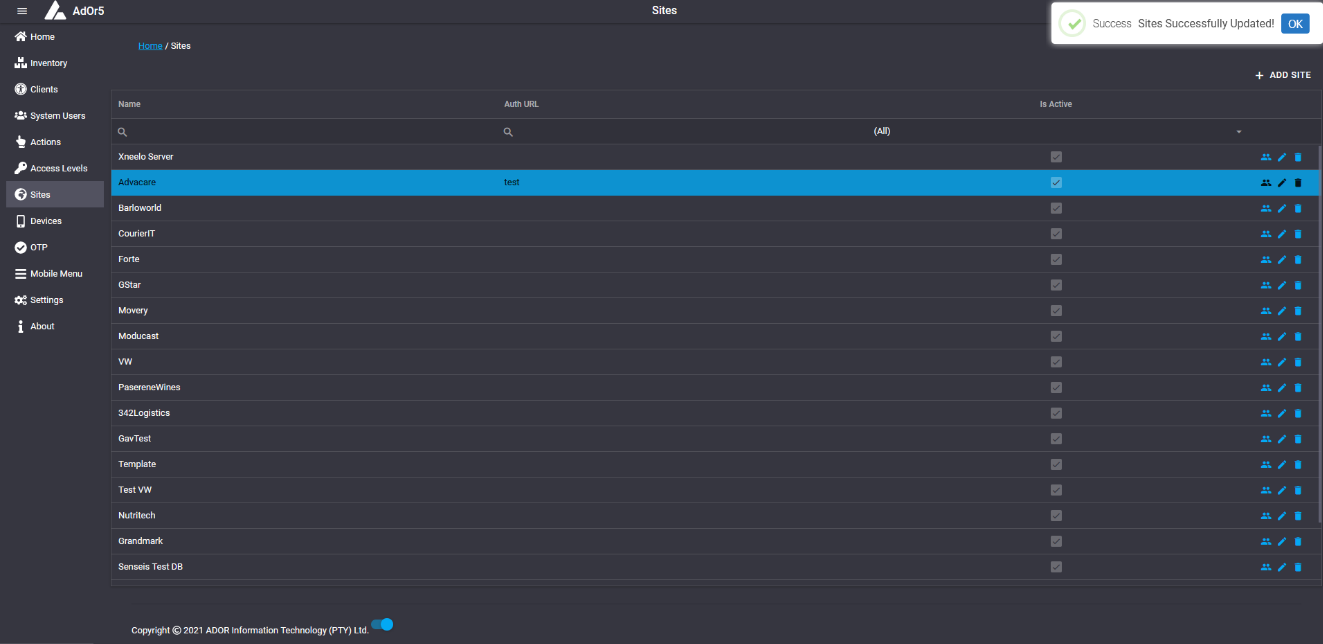
After clicking Save, a message, "Success. Site Successfully Updated!" will be displayed near the top right corner.
Delete Site
A site can be deleted by clicking on the trash can icon.
After clicking on the trash can icon you will be prompt with, "Are you sure you want to delete this record?".
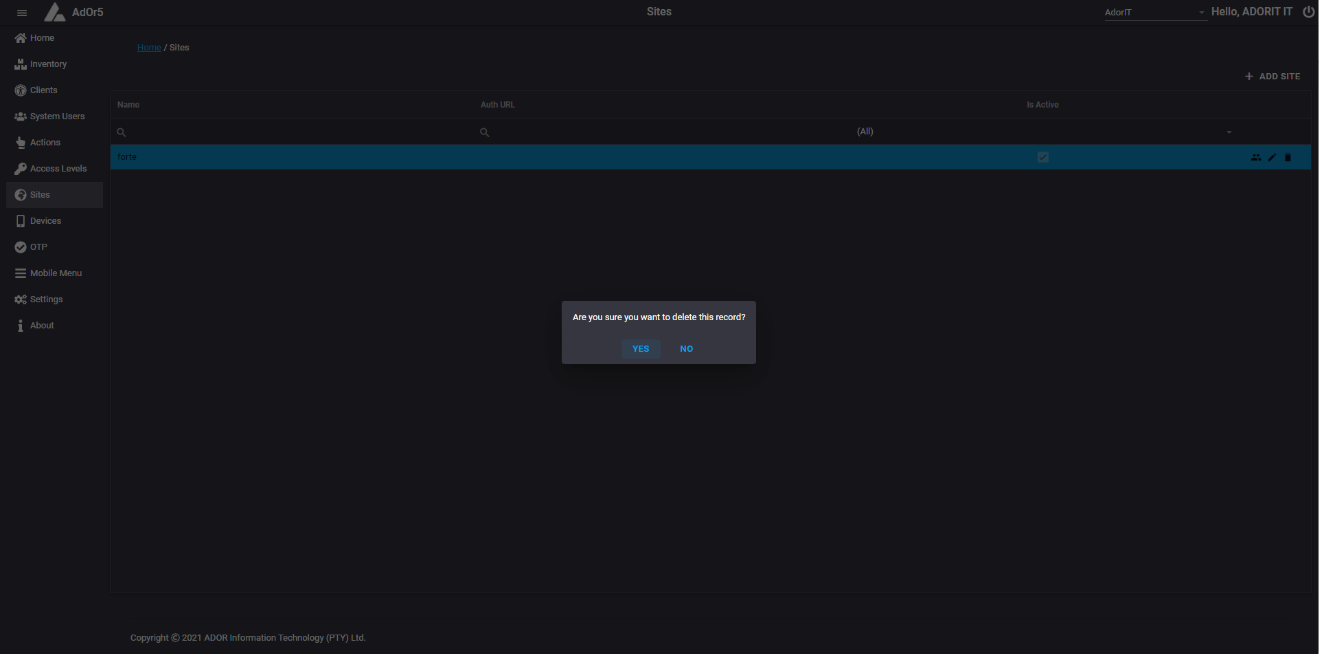
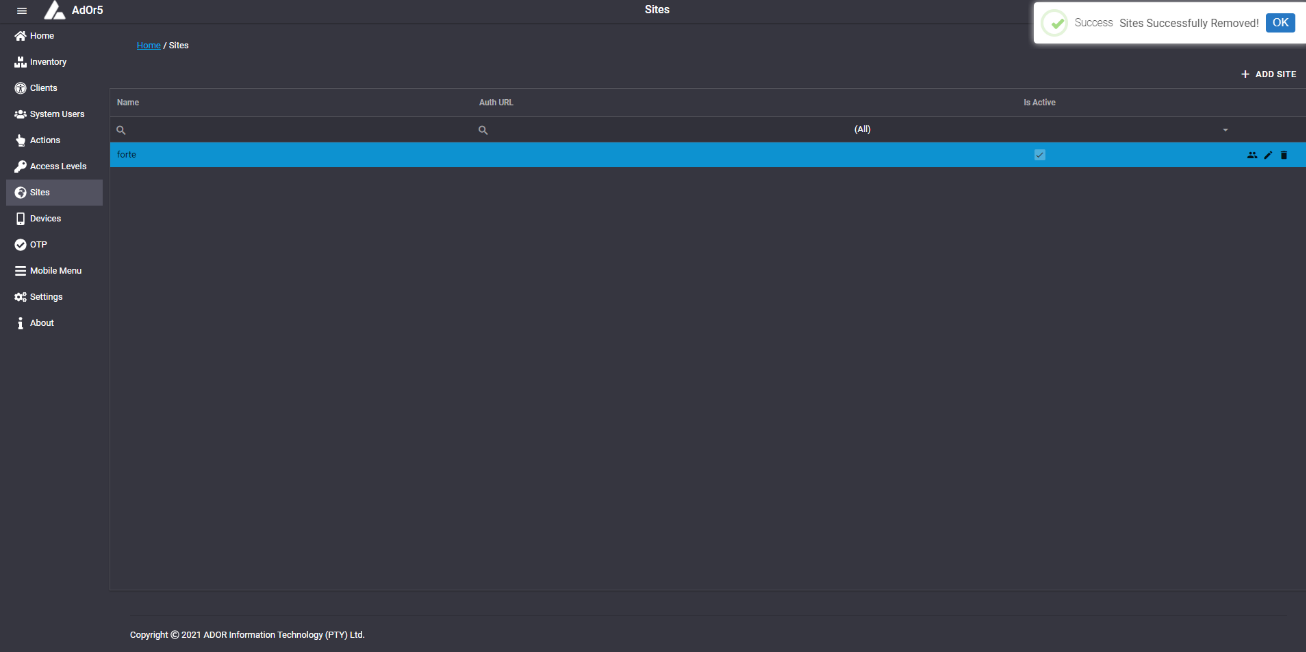
Clicking on Yes will delete the site and a message, "Success. Site Successfully Removed!".
Add Scanners
Clicking on the Human Avatars icon will open Scanner Users page.
The Scanner Users Page can only be accessed through the Scanners Page, by clicking on one of the Human Avatar icons next to the specific scanner.
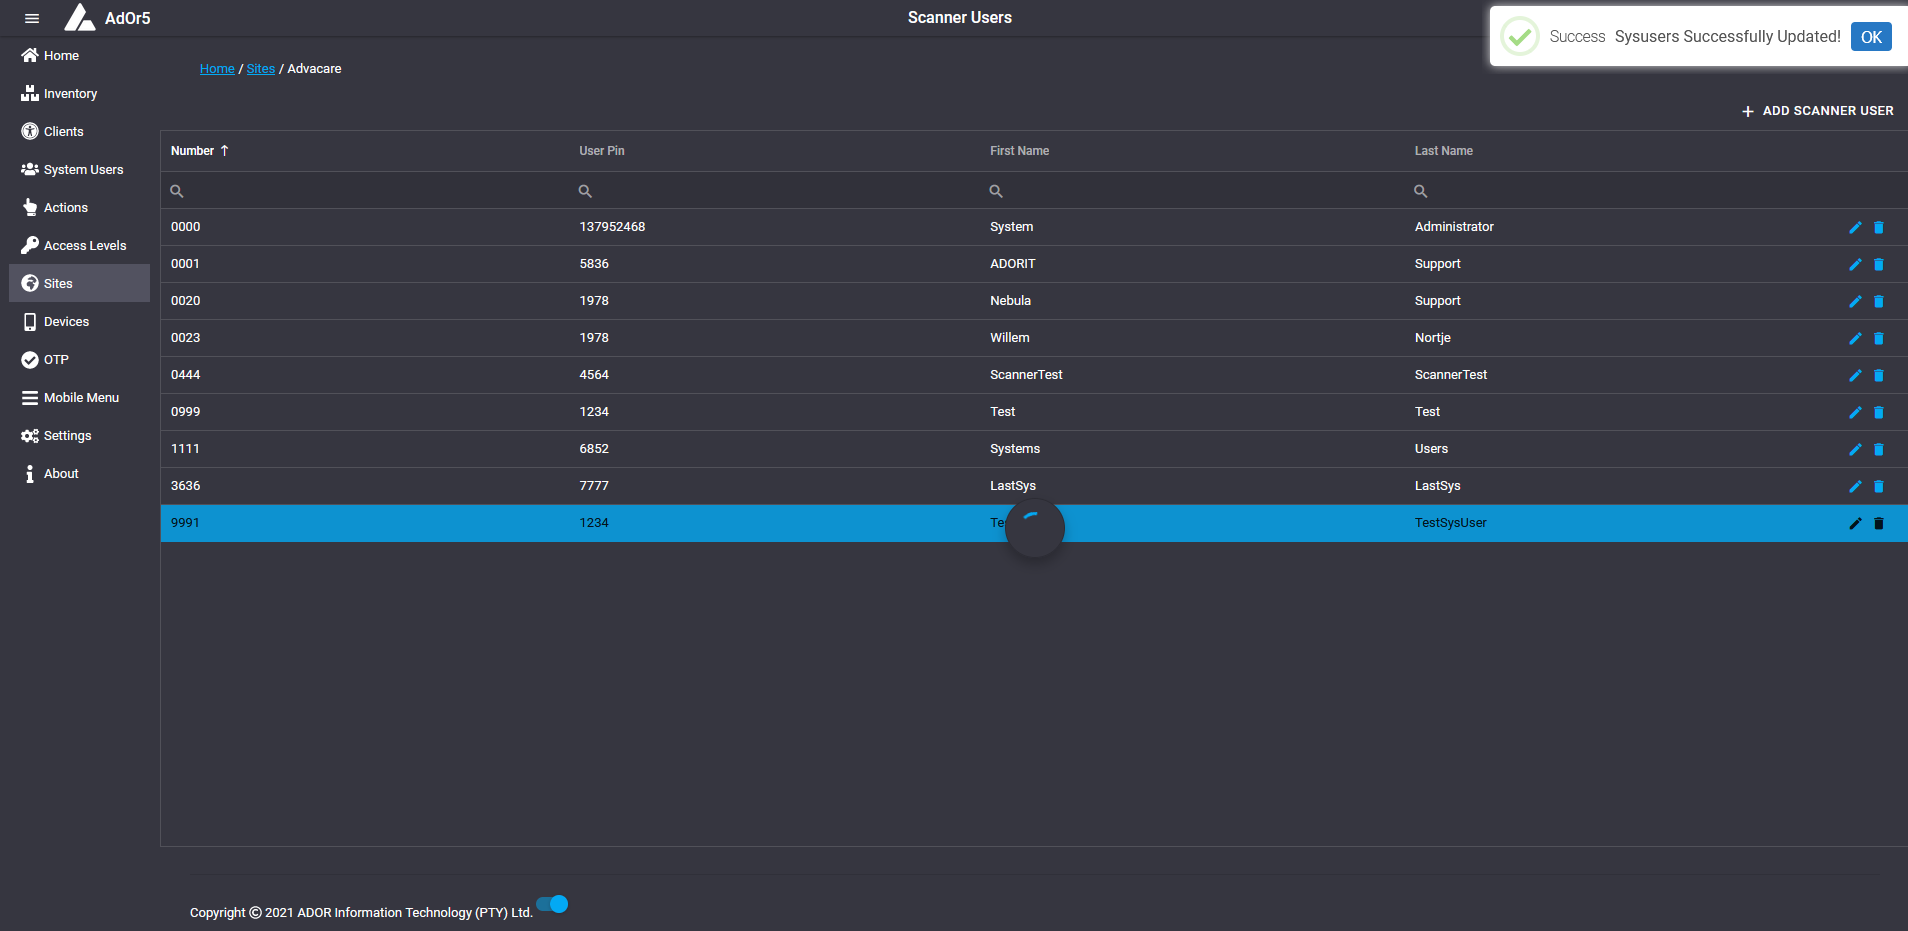
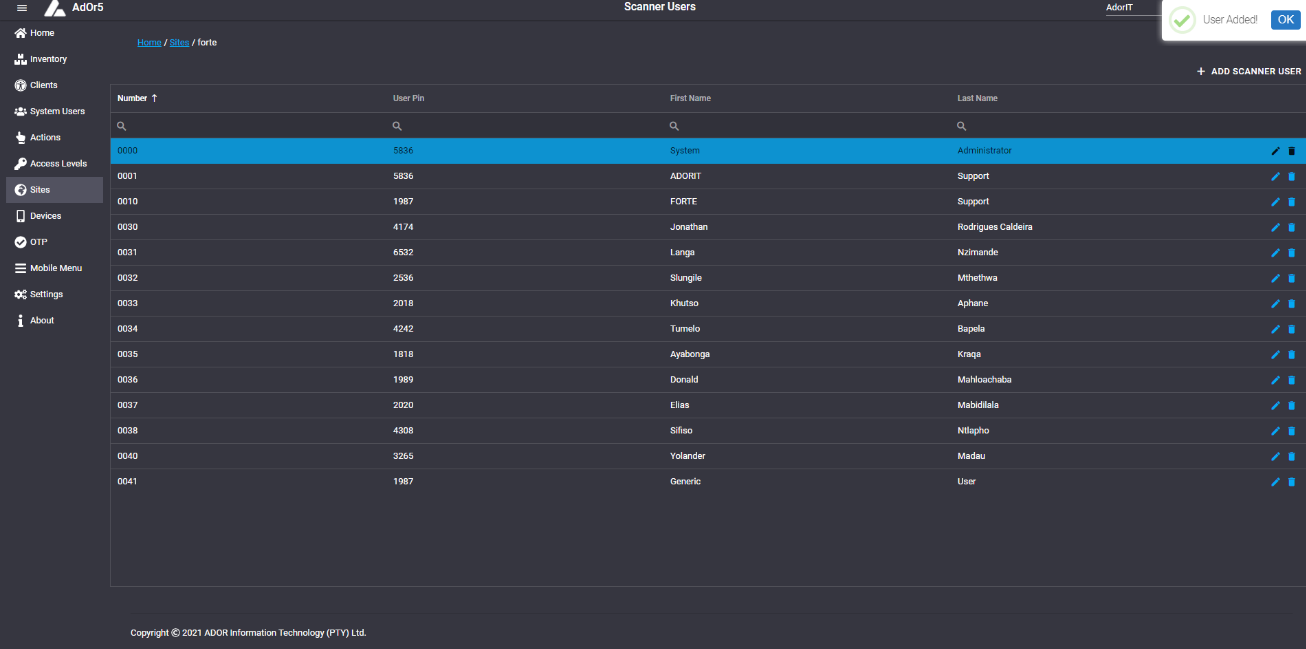
Scanner Users
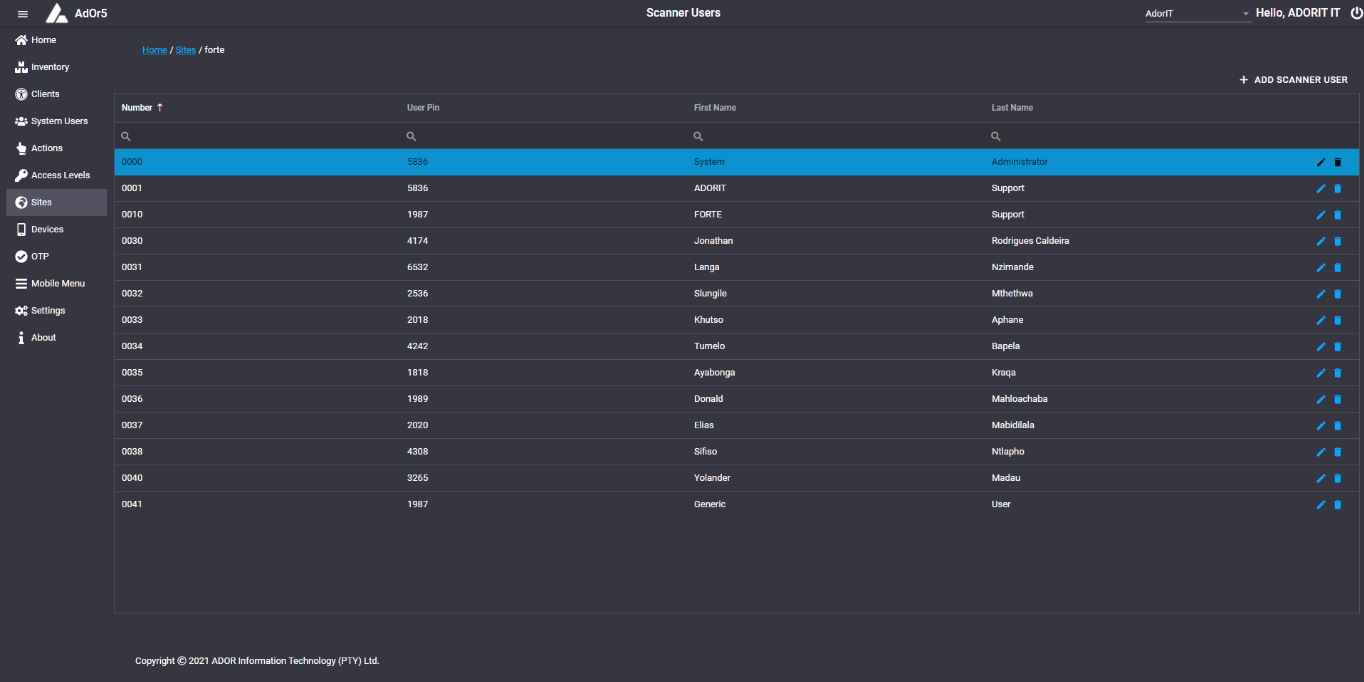
The Scanner Users site displays all the scanner users, with their Number, User Pin, First Name and Last Name displayed.
Add Scanner User
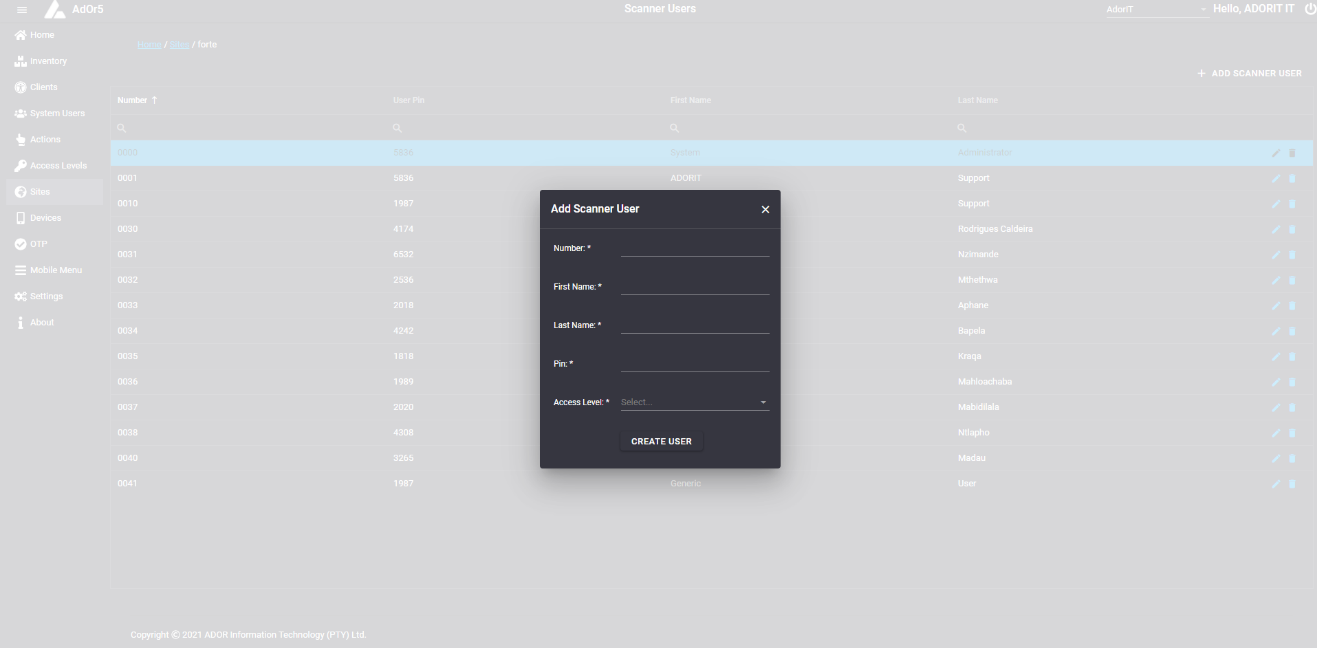
To add a scanner user, click on "Add Scanner User" near the top right corner.
A popup will appear with fields for Number, First Name, Last Name, Pin and a drop down list with Access Levels, that must be filled.
After filling all field and clicking Create User, a message "User Added!" will be displayed in the top right corner.
Delete Scanner User
A Scanner User can be deleted by clicking on the trash can icon next to the scanner user you want to delete.
A prompt with a message, "Are you sure you want to delete this record?" will appear, when clicking on the trash can icon.
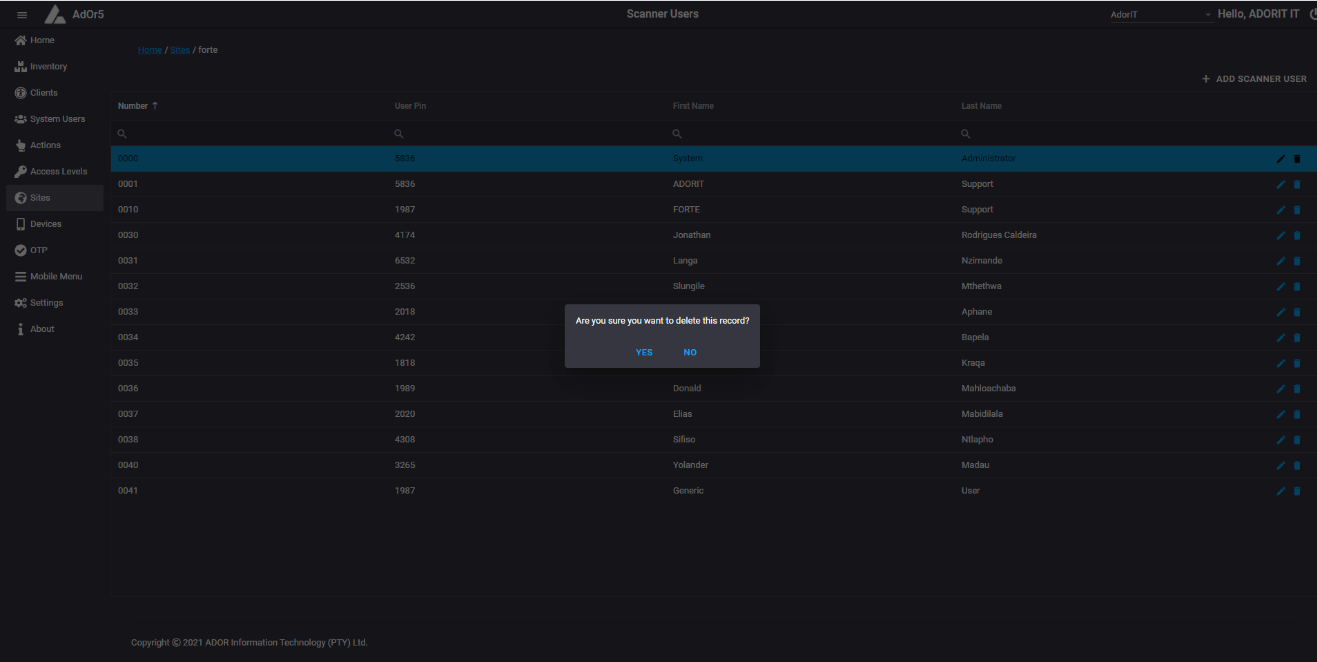
If Yes is clicked, the scanner user will be deleted.
Edit Scanner User
A scanner user can be edited by clicking on the pen icon next to the scanner user you want to edit.
Four textboxes and a drop down list that is populated with the Number, User Pin, First Name, Last Name and Access Level of the Scanner User will appear after clicking on the pen icon.
These textboxes and drop down list can be changed/edited.
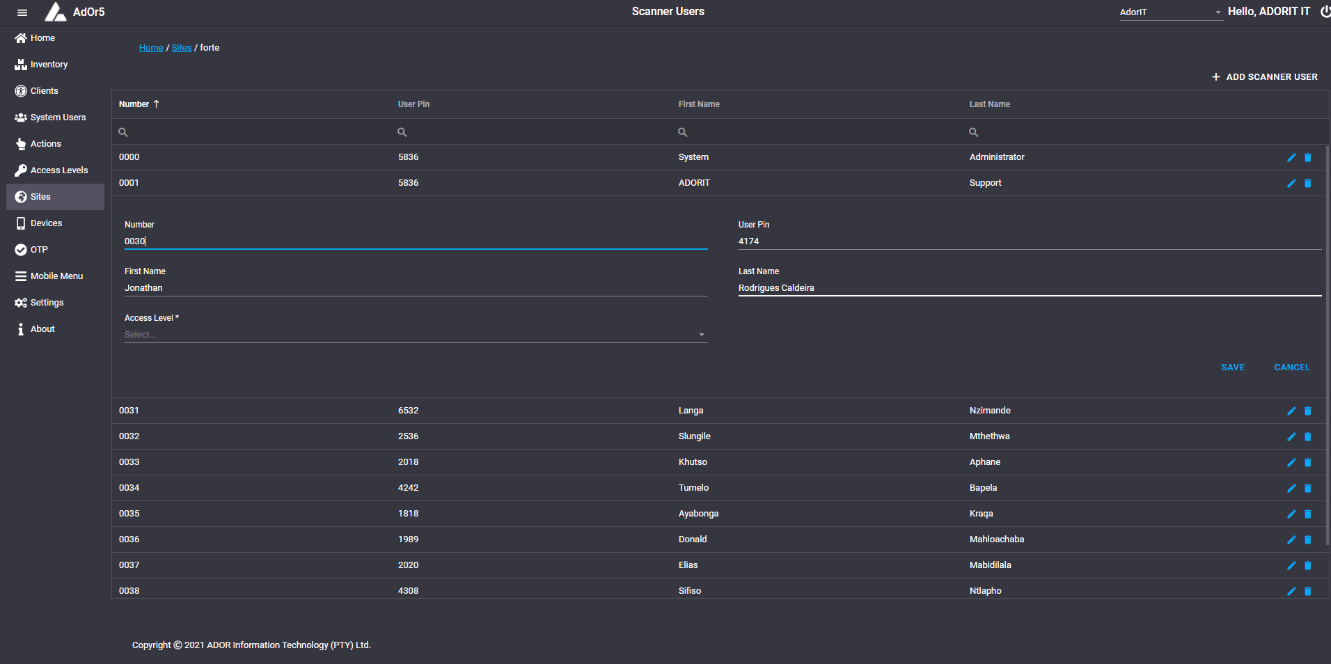
A message, "Success. Sysusers Successfully Updated!" will be displayed near the top right corner.