Edit
We are in the process of porting our user manual, this page might contain incorrect information.
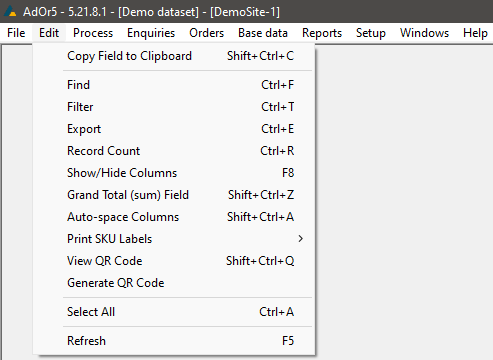
Copy Field to Clipboard
To copy data from a table, click the entry you wish to copy from then click Copy Field to Clipboard in the Edit menu. Then select which field you wish to copy from the list displayed. Alternatively, you can use the keyboard shortcut Ctrl + Shift + C.
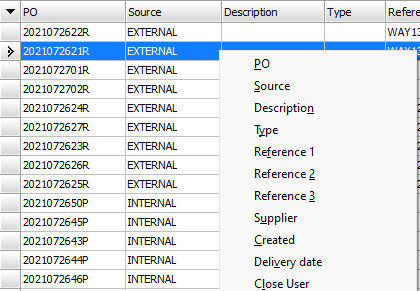
Find
To find a specific word, number or phrase, click Find in the Edit menu. Alternatively, you can use the keyboard shortcut Ctrl + F.
Select which field you want to search in from the Field drop-down list and then enter the text that you are searching for in the Find what field. You can also tick the Case Sensitive or Search only from this point forward boxes to narrow down your search criteria. Click Find to commit to your search or click Cancel to go back.
Filter
To filter the displayed data, select a line from the table you want to filter and click Filter in the Edit menu. Alternatively, use the keyboard shortcut Ctrl + T.
Select the field you want to filter by from the list on the left and then add which specific entries to filter by from the list on the right. Click Add to add each entry to your filter criteria. When wanting to add multiple filter criteria from one filter record click on the radio button "OR" and click add to the selected list or double click on the criteria itself is another method of adding the criteria to the filter box indicated in the red box.
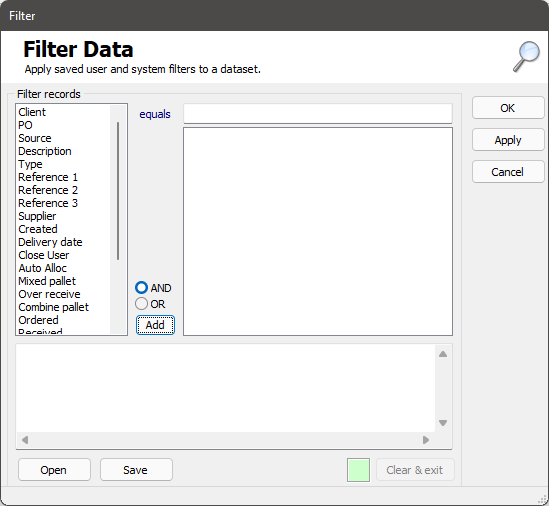
Filtering multiple filter records within a filter data set, select the radio button "AND" to add the multiple records as illustrated in the above example.
Click Apply to apply the filter or Cancel to cancel your changes. Once you have applied the filter. Click OK to exit the filter menu with the filter still applied.
You can also save the selected filter for later use by clicking Save. This will prompt you with two options
Save filter type "User" only for the user to view and use the saved filters
Save filter type "System" for all users to view and use the saved filters
To open a previously saved filter, click Open.
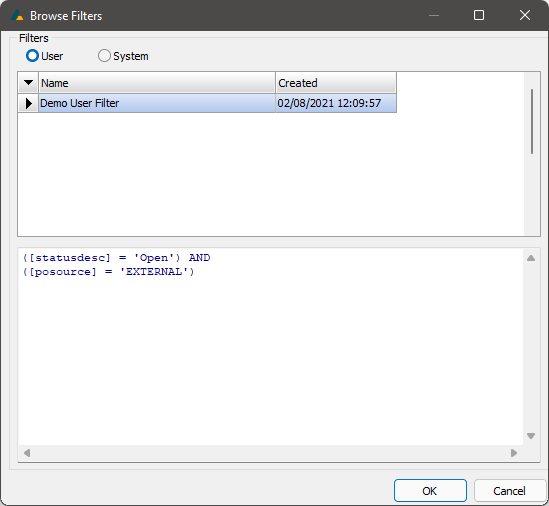
A pop-up box will appear prompting the user to select the radio button "User" or "System" when selected a list of saved filters will appear as illustrated in the above image. Click "OK" after filter is selected, the pop-up screen will have closed and take you back to the filter screen where the selected filter will be displayed in your filter box as illustrated in the first image. Click "Apply" and "OK"
Export
To export the currently displayed table of data into MS Excel, click anywhere in the table to select it, then click Export from the Edit menu. The number of rows and the time to export will be displayed in the status bar in the bottom left corner of the screen. Alternatively, use the keyboard shortcut Ctrl + E.
Record Count
To show how many records are displayed in whichever table of data you are viewing, click Record Count in the Edit menu. The number of records will then be displayed in the status bar in the bottom left corner of the screen. Alternatively, use the keyboard shortcut Ctrl + R to do this.
Show/Hide Columns
To show or hide columns from the table that you are viewing, click Show/Hide Columns in the Edit menu and select the columns from the list. You can also do this by pressing F8 on your keyboard and then selecting from the list. If there is a ✓ displayed in front of the column name the column will be displayed in the viewing screen.
Grand Total (sum) Field
To view the grand total of a field consisting of numerical values, click Grand Total (Sum) Field in the Edit menu and select the field from the list. Alternatively, use the keyboard shortcut Shift + Ctrl + Z. Each screen will display multiple options numeric values the user can total up on.
Auto-space Columns
To automatically change the spacing of all columns in the currently displayed table to display all data, click Auto-space Columns in the Edit menu. You can also use the keyboard shortcut Shift + Ctrl + A.


Print SKU Labels
If the displayed data contains all the necessary information to print an SKU label, you can do so by clicking SKUs in current grid under Print SKU Labels in the Edit menu.
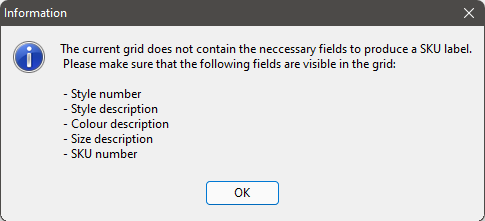
If the necessary fields are not present in the current screen, you will receive an error message showing which fields should be present.
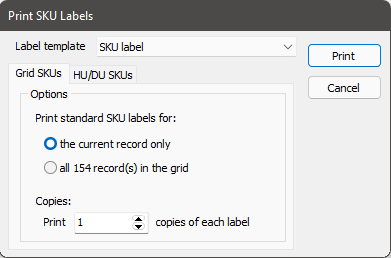
If the correct fields are present, you can select whether you want to print labels for the current record or for all the records in the grid, as well as the number of copies to print. Click Print to proceed with printing the labels or Cancel to exit the screen.
Alternatively, use the Print SKUs in HU/DU under Print SKU Labels in the Edit menu to print SKUs for a specific HU or DU.
If the HU/DU number does not exist or does not contain stock, you will receive the following error message.
QR Code
To create a QR code from a table, click the entry you wish to generate from then click View QR Code in the Edit menu. Then select which field you wish to generate from the list displayed. Alternatively, you can use the keyboard shortcut Ctrl + Shift + Q.
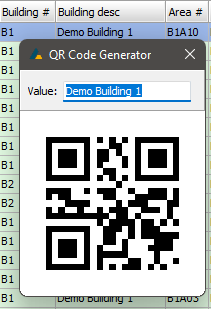
To create a QR code click Generate QR Code in the Edit menu. Then enter the value you wish to generate.
Select All
To select all the data in the displayed table, click Select All in the Edit menu. Alternatively, use the keyboard shortcut Ctrl + A.
Refresh
To refresh the data displayed, click Refresh in the Edit menu. You can also press F5 on your keyboard to refresh the data.